Tel: +86-18929108896 Email: solomon@sum-ho.com
- All
- Product Name
- Product Keyword
- Product Model
- Product Summary
- Product Description
- Multi Field Search


Views: 0 Author: Site Editor Publish Time: 2026-08-14 Origin: Site


A binding control cable turns routine lawn maintenance into a frustrating, physically demanding task. Worse, it poses a direct safety hazard. You need the engine or drive system to disengage immediately upon releasing the handle lever. A delayed response causes dangerous accidents and property damage. Whether you face a stubborn drive control issue or a stuck engine throttle, binding usually indicates internal friction, physical damage, or improper routing. Identifying the exact source of resistance saves you from unnecessary mechanical repairs. It also guarantees reliable equipment operation for the rest of the season. This guide isolates the root causes of lawn mower control cable binding. We provide a definitive framework to help you decide your next steps. You will learn precisely when to lubricate, adjust, or completely replace the assembly. Read on to master symptom recognition, test your linkages, and restore safe performance to your machine.
Most modern mowers rely on Bowden cables to operate their systems. These simple mechanical devices transmit pulling force over physical distances. They consist of an inner braided steel wire. This wire moves freely through a flexible, hollow outer housing. The outer sleeve usually features a wound steel spiral covered by a protective vinyl coating. This sleeve protects the inner core from environmental damage. It also provides a rigid path for the tension force to travel. Binding occurs when the tight manufacturing tolerance between the inner wire and outer sleeve fails.
You must recognize the early warning symptoms to prevent failure. A spongy or delayed lever return often indicates surface rust. It can also point to dust buildup packing inside the sleeve. The lever feels stiff under your hand but eventually moves. Conversely, a hard stop or complete seizure requires immediate attention. This aggressive symptom usually points to a severe physical kink. It might also mean internal metal fraying or a jammed metal linkage at the transmission deck.
Different line types present different operational hazard levels. A binding Lawn Mower Throttle Cable causes erratic engine surging. It physically prevents you from throttling down the engine during an emergency stop. A binding Lawn Mower Clutch Cable manifests differently but remains equally dangerous. It leaves you entirely unable to engage or disengage the self-propelled drive wheels. A seized clutch line can also keep the heavy mower deck blades spinning dangerously long after you release the safety bar.
Particulates easily invade the internal assembly. They enter through compromised rubber dust boots or exposed metal connection ends. Dust mixes with old factory grease over time. This reaction creates a thick, abrasive paste. The paste packs the tight housing tightly. It creates massive friction against the inner wire. Regular mowing in dry, dusty conditions accelerates this process rapidly. You will notice the lever becoming progressively harder to pull over several weeks.
Water serves as the primary enemy of bare steel wire. Washing your mower aggressively forces water directly inside the housing ends. High-humidity storage in outdoor sheds also causes condensation buildup. The trapped moisture causes the inner steel core to rust. Rust rapidly expands the diameter of the wire. The expanded, rough wire rubs aggressively against the inner walls of the outer sleeve. This leads to a gritty, sluggish feeling when operating the lever.
Physical damage ruins line functionality instantly. Operators often catch the hanging loop on low tree branches or fence posts. Loading the mower into a truck bed carelessly can crush the housing. Folding the mower handles improperly for winter storage creates sharp bends. Routing the wire too close to the exhaust muffler melts the protective plastic sleeve. Any sharp angle or crush point permanently pinches the outer housing against the inner moving wire.
Steel cores endure thousands of tension cycles during their lifespan. Repeated pulling causes individual steel strands to weaken. Eventually, a single microscopic strand snaps inside the housing. The broken strand spools backward inside the tight space. It acts exactly like a mechanical wedge. Pushing the lever forces the wedge tighter against the sleeve. This causes a complete, sudden seizure of the mechanism.
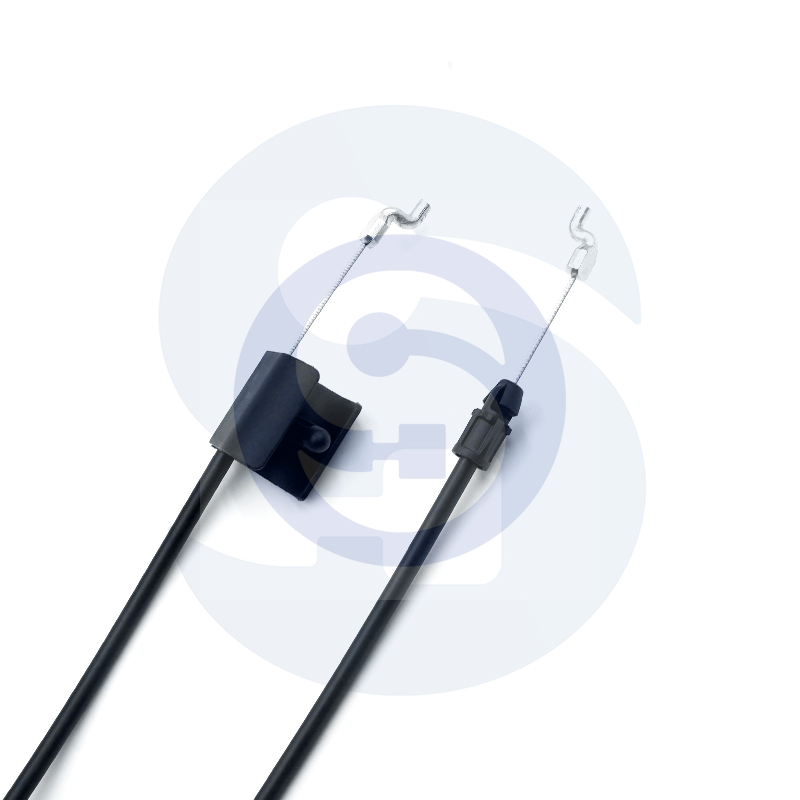
You need a systematic approach to find the exact bind location. Follow these precise steps to isolate the friction source accurately.
Making the right repair choice saves time and frustration. You must assess the damage severity accurately before buying parts or lubricants.
You can save intact components with proper lubrication techniques. This maintenance process usually costs between $5 and $15.
Certain damage conditions make repair impossible and highly dangerous. Full replacement typically costs between $15 and $40.
Choosing the correct part guarantees smooth mechanical operation. OEM parts guarantee the exact length, proper adjuster barrel threads, and accurate spring tension. If you evaluate aftermarket options, verify exact model number compatibility. A replacement part that sits off by even 1/2 inch will fail. It will not engage the transmission drive or engine throttle properly, rendering the machine unusable.
Cable Action Plan
| Condition Observed | Primary Symptom | Recommended Action | Estimated Cost |
|---|---|---|---|
| Intact outer sleeve, minor stiffness | Spongy, slow lever return | Flush with dry PTFE lubricant | $5 - $15 |
| Visible sharp bend or crush mark | Hard stop midway through pull | Complete assembly replacement | $15 - $40 |
| Melted plastic near engine block | Total seizure of inner wire | Replace and reroute away from heat | $15 - $40 |
| Stretched or distorted end spring | Lever fails to return to neutral | Replace spring or entire assembly | $10 - $25 |
Proper installation prevents the friction problem from returning next season. Pay close attention to how you secure the new assembly to the mower deck.
Many users secure loose lines tightly to the mower handle to keep things neat. They often use standard heavy-duty plastic zip-ties. Pulling a zip-tie too tightly crushes the flexible outer housing instantly. This creates a permanent internal pinch point. Leave the zip-ties slightly loose. The wire housing needs physical room to flex as the machine vibrates. Use specialized factory routing clips or velcro straps whenever possible.
Storing the mower usually requires folding the main handles. Always follow standard manufacturer procedures for this step. Loosen the wing nuts entirely before moving the bars. Bring the handles forward gently. Ensure the lines loop gracefully without catching on the metal brackets. Pinching the lines in the folding hinge ruins them instantly. Check the slack visually before tightening the storage knobs back down.
Engine heat destroys plastic housings very quickly. Ensure the line routes strictly away from the hot engine block. Keep it far from the exhaust muffler shield. Use factory-installed metal guide rings to maintain safe clearance zones. An improperly routed line melts within minutes of heavy engine operation. This melts the plastic and fuses the inner wire to the sleeve permanently.
Diagnosing a binding control line is straightforward once you understand the mechanics. You must isolate the assembly from the mechanical linkages first. This proves whether the friction lives inside the housing or down at the transmission block. Follow these final takeaways to maintain your lawn equipment properly:
Perform the isolation test today if your lever feels heavy or slow. Replacement usually offers the most time-efficient and reliable route for heavily used mowers. A fresh, properly routed installation ensures safe, predictable operation for the entire mowing season ahead.
A: No. Standard WD-40 is a water displacer and solvent. It dries out quickly and leaves a sticky residue behind. This residue acts like a magnet, attracting dust, grass, and dirt. Over time, it creates an abrasive paste that worsens the internal friction. Always use a dry PTFE (Teflon) or graphite cable lubricant instead.
A: Cables stretch due to normal metal fatigue from thousands of tension cycles. Stretching also occurs rapidly when you apply excessive force to overcome a stuck transmission linkage. Finally, purchasing low-quality aftermarket replacement cables with inadequate gauge thickness leads to premature stretching under normal operational load.
A: Most cables require a slight amount of slack at the lever before engaging. This play typically measures about 1/8 to 1/4 inch. However, exact tolerances depend strictly on the manufacturer's specifications. Always consult your owner's manual for the precise tension requirements for your specific drive or throttle system.
