Tel: +86-18929108896 Email:solomon@sum-ho.com
- All
- Product Name
- Product Keyword
- Product Model
- Product Summary
- Product Description
- Multi Field Search


Views: 0 Author: Site Editor Publish Time: 2026-07-05 Origin: Site


Trying to install a clutch cable on a motorcycle sounds simple until the real issues appear: routing, access, fit, and final adjustment. In most cases, the cable itself is not the difficult part. The challenge is making sure the new cable moves smoothly, seats correctly, and delivers a clean clutch feel after installation. That is why this job should be treated as part replacement and part control-system setup. At Dong Guan SumHo Control Cable Co., Ltd., known as SUMHO CONTROLCABLE, cable systems are developed for motorcycle and industrial applications where fit accuracy, stable movement, and durability all matter, so proper installation plays a direct role in long-term performance.
A clutch cable installation usually goes smoothly when preparation is done first. Many fitting problems come from starting too quickly without checking the cable, the route, or the working space around the bike.
Before picking up tools, check that the new cable matches the motorcycle correctly. Length matters because a cable that is too short can create tension or tight bends, while one that is too long may produce awkward routing or extra slack. End fittings matter just as much. If either end does not match properly, the cable may appear to fit while actually operating under strain.
This is why fit is one of the most important parts of clutch cable installation. The real question is not just whether the cable can be attached, but whether it can move naturally after installation. A proper fit supports smooth pull, stable free play, and cleaner clutch engagement.
It also creates a natural link to product quality. A cable built with accurate fittings, stable dimensions, and durable housing is easier to install correctly and easier to trust in use.
The tools are usually basic, but access can vary a lot from one motorcycle to another. Some bikes need only simple hand tools and clear access near the lever perch and clutch release area. Others may require removing covers, panels, or nearby parts to expose the cable path properly.
That is why access should be checked before the old cable is removed. If the cable route passes behind frame sections or through tighter spaces, it is much easier to plan the job first than to discover access problems halfway through. A clean and organized work area also helps keep clips, adjusters, and small parts under control.
Item | Why you need it | Optional or essential | Common mistake |
Correct replacement cable | Ensures proper fit and end connections | Essential | Using a cable that is close but not correct |
Basic hand tools | For covers, adjusters, and mounting points | Essential | Starting without checking all access points |
Camera or phone photo | Helps preserve original routing reference | Optional but useful | Relying on memory alone |
Clean work area | Keeps parts organized and easier to manage | Essential | Losing clips or mixing hardware |
Light lubricant if appropriate | Helps maintain smooth movement | Optional | Using it to hide damaged parts |
Inspection time | Helps check perch, route, and wear points | Essential | Replacing only the cable without checking the system |
The safest way to remove the old cable is to release tension first and keep as much reference as possible. That means starting with the adjusters rather than pulling the cable out immediately. Reducing tension makes removal easier and lowers the chance of damaging fittings or forgetting the original setup.
Taking a few photos before removal is one of the simplest ways to avoid trouble later. The original cable path, the angle near the lever, and the position of guides or clips can all be useful during installation. Many routing mistakes happen because the installer remembers the general path but misses one small detail that kept the cable moving smoothly.
As the cable is removed, check it for clues. Fraying near one end, flattened housing, or rubbing marks often show why the old cable needed replacement. This matters because installing a new cable without understanding the old wear pattern can lead to the same problem again.
This stage is also a good time to inspect the lever perch and pivot area. If those parts are dirty, worn, or rough, a new cable may still feel poor once installed.
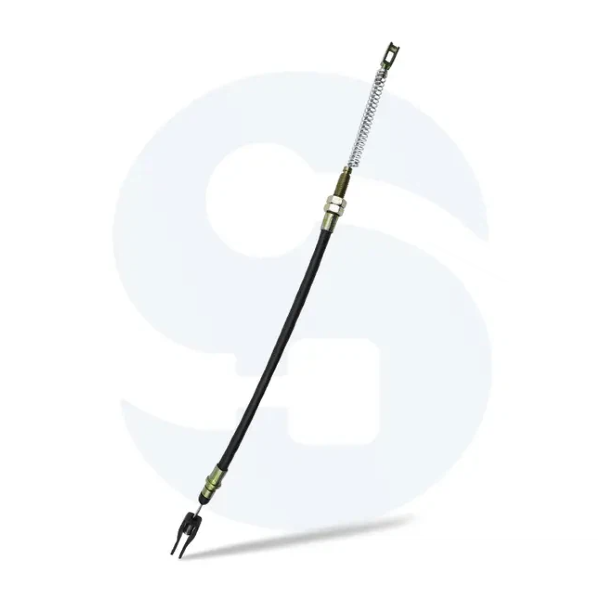
Once the new cable has been checked and the old one removed, installation begins. This is the stage where small mistakes can create poor clutch feel even when the new part itself is good.
The original route is usually the best starting point, as long as it did not show signs of strain. The cable should move through the motorcycle in a natural path without sharp bends, pinch points, or areas where steering movement increases tension. Smooth travel is the main goal.
If the route is too tight, the rider will feel the resistance at the lever. Tight bends increase drag and shorten service life. Heat exposure also matters. If the cable passes too close to engine heat, the housing may age faster and movement may become less stable.
The old route should therefore be used as a guide, not followed blindly. If the previous cable showed rubbing or stress, the new installation should correct that.
Correct seating at both ends matters just as much as routing. A cable that is not fully seated at the lever perch or clutch-side connection can imitate the symptoms of a bad cable. The rider may notice unstable free play, rough lever feel, or inconsistent clutch engagement even though the problem is only installation-related.
Both ends should align cleanly and sit fully in place. A connection that looks acceptable is not always correct. What matters is whether the cable can move naturally under load without twisting or extra friction.
This is where manufacturing precision becomes practical value. Accurate end fittings and stable dimensions make the cable easier to install and more dependable in use. SUMHO CONTROLCABLE develops cable systems for repeated-use applications where fit accuracy and stable operation are part of the product’s real performance.
Adjustment is what turns a correctly installed cable into a properly working clutch system. Even with good routing and correct seating, the cable still needs the right amount of initial slack.
The cable should not be too tight, and it should not have excessive free play. Too much slack wastes lever travel and makes disengagement feel delayed. Too little slack can make the clutch feel too sensitive and prevent it from settling naturally. The goal is a small, controlled amount of free play that gives clear response without preload.
Adjustment should be done in small steps. After each change, the rider should pull the lever several times and check the friction zone again. This matters because installation and adjustment work together. A well-routed cable can still feel wrong if the final setup is poor.
It is also normal to recheck the setting after initial use. Sometimes a newly installed cable settles slightly once everything has moved through its first few cycles.
Before riding, the installation should be checked by feel and function. Start with the lever itself. It should move smoothly without roughness or hesitation. Then turn the handlebars from side to side and make sure the cable does not tighten or change the clutch feel as steering angle changes.
Next, check clutch engagement. The friction zone should feel predictable, starts should feel smooth, and the system should behave consistently rather than differently on each pull. A short low-speed test is often enough to confirm that the clutch engages and releases cleanly.
The final goal is simple. A properly installed cable should make the clutch feel natural, not like a part that still needs to be watched closely.
To install a clutch cable on a motorcycle properly, fit, routing, seating, and adjustment all need to work together. When those details are handled correctly, the clutch feels smoother, engages more cleanly, and delivers more reliable performance over time. That is also where the value of a well-made motorcycle clutch cable becomes clear. SUMHO CONTROLCABLE supports these needs through the development and manufacturing of control cable systems for motorcycle applications where fit accuracy, smooth movement, and durability matter in actual service. If you are looking for replacement solutions or cable products for your market, contact us.
Check the cable length, end fittings, and the route it needs to follow. A correct fit is the first step toward smooth installation and reliable clutch feel.
Usually yes, but only if the old route did not show tight bends, rubbing, or heat exposure. The old path is a guide, not always the perfect answer.
The most common reasons are poor seating, incorrect free play, routing that is too tight, or worn related parts around the lever or release mechanism.
Check lever feel, steering movement from lock to lock, cable freedom along the route, and smooth clutch engagement during a short low-speed test.
