Tel: +86-18929108896 Email: solomon@sum-ho.com
- All
- Product Name
- Product Keyword
- Product Model
- Product Summary
- Product Description
- Multi Field Search


Views: 0 Author: Site Editor Publish Time: 2026-08-20 Origin: Site


A snapped or stretched cable brings yard work to a dead halt immediately. Buying the wrong replacement inevitably leads to frustrating returns. Worse, incorrect parts introduce serious safety hazards during equipment operation. Exact mechanical alignment remains strictly crucial for outdoor power tools. You need the correct operational tension for safe, predictable use. Guessing connection types often results in poorly mismatched components. This common mistake leaves your machine completely unusable. We provide a precise framework for identifying, measuring, and matching these specific parts. You will learn how to analyze connection points correctly. We also cover how to measure wire travel length accurately. This comprehensive guide empowers buyers to confidently source the correct replacement part the first time. Read on to master the exact process for identifying your equipment's critical hardware.
Buyers frequently purchase the wrong Replacement Mower Throttle Cable or drive line. They make this expensive mistake because they misidentify the connection point type. Every wire relies on highly specific anchor styles. These anchors ensure proper mechanical engagement. If you choose the wrong shape, the mechanism will slip or fail completely during operation. You must understand the distinct structural differences between each connector.
We classify these essential components into four main solution categories. Each distinct type serves a unique mechanical purpose on your landscaping equipment.
You must apply a strict evaluation lens to your broken part. Determine whether the component features identical fittings on both ends. Many modern machines use a highly complex hybrid setup. For example, you might find a basic Z-bend at the operator handle. The opposite end might feature a heavy-duty spring mounted at the transmission. Identifying both ends prevents ordering the wrong configuration entirely. Correctly identifying lawn mower control cable fittings forms the ultimate foundation of successful equipment repair.
Relying solely on a mower's model number can sometimes lead to frustrating discrepancies. Manufacturers often source different parts mid-production. They frequently update chassis designs or switch suppliers between factory production runs. Therefore, physical hardware verification becomes strictly required. You cannot skip measuring the physical components.
We use three strict measurement criteria. These specific criteria guarantee an exact fit for your replacement part. Understanding these dimensions prevents installation failures.
| Measurement Area | How to Measure Properly | Why It Matters Functionally |
|---|---|---|
| Outer Conduit Length | Measure the black protective sleeve. Start at the top plastic anchor. End at the bottom plastic anchor. | Ensures the protective sleeve reaches the chassis mounting brackets without stretching or kinking. |
| Inner Wire Travel | Measure the total length of the exposed steel wire. Do this only when you fully extend it. | Determines the exact throw distance needed to engage the transmission or engine throttle effectively. |
| Gauge and Thickness | Verify the solid metal wire diameter using precise digital calipers. | Ensures the wire fits seamlessly through the plastic control levers without binding or catching. |
Remove the broken component completely before measuring. This serves as our most critical actionable advice. Attempting to measure it while still routed through the mower chassis leads to highly inaccurate readings. Bends, curves, and brackets hide the true length. Lay the old part completely flat on a clean workbench. Use a standard steel tape measure. Pull the inner wire taut. Document the dimensions in both inches and millimeters. This dual-unit recording helps immensely when checking different vendor online specifications. Keep these written numbers handy during the ordering process.
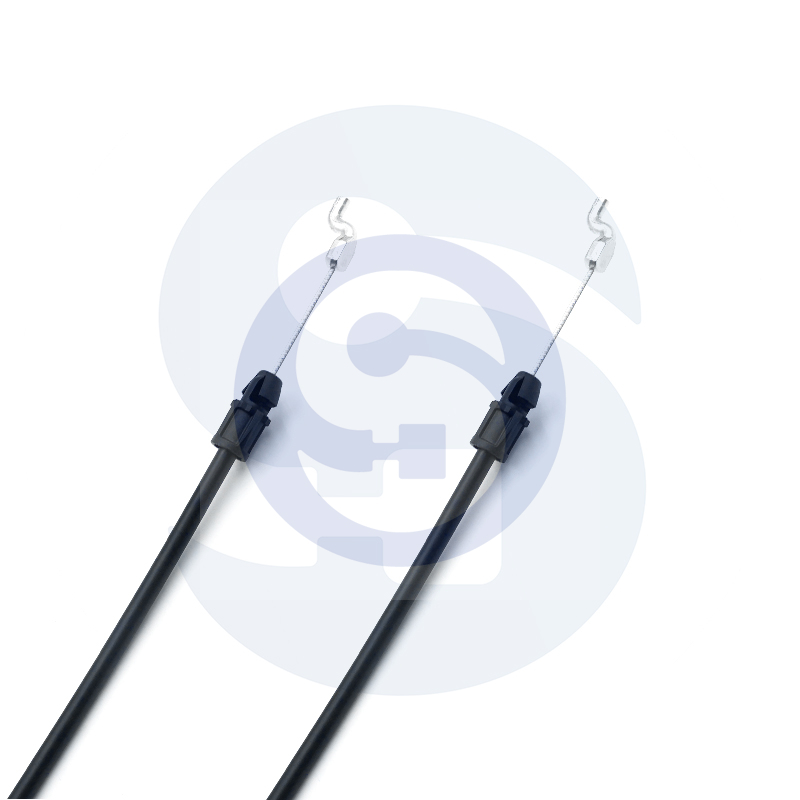
Buyers face a distinct choice between factory original parts and third-party alternatives. We use a structured decision matrix to evaluate these opposing options. This logical approach minimizes compatibility risks. It also maximizes your repair budget efficiency.
Original Equipment Manufacturer (OEM) parts offer the highest verifiable compatibility. They represent the absolute safest choice for complex, proprietary hybrid fittings. We strongly recommend OEM parts for mowers currently under factory warranty. They carry a notably higher initial cost. However, they present the absolute lowest risk of premature mechanical failure. The manufacturer engineered these exact parts for your specific deck and engine configuration. They use the correct steel tempering processes.
Aftermarket replacements provide a highly cost-effective alternative. They are widely available online and in local hardware stores. These generic parts work exceptionally well for standard, older mowers. Older machines typically utilize universally adopted Z-bends. If your machine uses basic connection points, aftermarket options make perfect financial sense. They restore function without breaking the bank.
You must approach aftermarket components exercising high trust and transparency. Many buyers falsely assume aftermarket parts are always 1:1 identical to factory originals. In reality, aftermarket spring ends frequently feature wildly varying tension rates. They might feel significantly stiffer or softer compared to original factory specs. This alters how the machine feels during operation. A stiff spring tires out your hands quickly.
Apply a strict shortlisting logic before completing checkout. Verify the vendor's return policy first. Check compatibility cross-reference charts provided directly by the seller. Confirm the exact millimeter and inch specifications against your workbench measurements. Never rely on visual similarity alone. A component might look identical in a photo but measure half an inch too short. This tiny structural discrepancy renders it completely useless for your machine.
Replacing these components seems straightforward initially. However, improper matching techniques introduce severe implementation risks. These mistakes compromise the overall safety of your outdoor power equipment. You must actively avoid these common errors to ensure safe operation.
These specific matching mistakes lead directly to repeated breakdowns. You waste valuable time dismantling the machine again. Prioritize exact matching to ensure long-term mechanical reliability. A properly matched component easily lasts for many consecutive mowing seasons. It keeps your maintenance schedule predictable.
You now understand the internal mechanics of these connection points. It is time to execute a highly concrete action plan. Follow these precise steps before placing your final parts order.
First, record your mower's physical deck size and manufacturer brand. Locate the exact serial and model number. Manufacturers usually print this critical data on a metal sticker under the seat. Sometimes they place it directly behind the engine block. Keep this vital information handy on your phone.
Second, rigorously compare your physical measurements against the vendor’s published spec sheet. Check the inner travel distance specifically. This exact number dictates whether the control lever will function correctly. If the vendor omits this specific measurement, contact their support team directly. Do not guess the length based on rough estimates.
Third, carefully inspect the mower’s plastic levers and metal mounting brackets. Look for excessive mechanical wear. A highly worn lever hole might cause even a brand-new fitting to slip out repeatedly. If you spot severe oval-shaped wear on the plastic levers, replace them simultaneously. This prevents future headaches.
We offer one vital rollout lesson for your installation prep. Take detailed, clear photos of the original cable routing before discarding the broken unit. Capture multiple angles. Modern mowers feature incredibly complex chassis designs. You must ensure the new routing firmly avoids hot engine exhaust components. It must also safely bypass sharp pinch points near the spinning wheels. Proper secure routing extends the lifespan of the new part significantly. Use heavy-duty zip ties to secure loose sections away from moving belts.
Matching lawn mower control cable fittings involves exact mechanical alignment. It is never a simple matter of guesswork. Every specific angle, diameter, and spring coil plays a massive role in overall equipment function. Proper matching keeps your outdoor power tools safe and predictable.
Here are your actionable next steps:
We strongly encourage buyers to prioritize highly accurate measurements. Rely on reputable vendor sourcing to restore your equipment safely. Proper fitting selection ensures smooth, reliable operation. It ultimately brings your mower back to peak performance without unnecessary seasonal downtime.
A: Universal cables require manual cutting and fitting attachment. They serve as an acceptable temporary fix in a pinch. However, they introduce significant human error into the assembly. Exact-fit cables prove significantly more reliable. We highly recommend sourcing the precise size for long-term safety and performance.
A: You will notice excessive mechanical "play" in the lever hole. The wire might wobble loosely. Conversely, if you must use a tool to force it in, the gauge is too thick. A correct Z-bend slides in seamlessly but sits snugly during operation.
A: A slightly longer conduit can sometimes be routed safely around the engine block. However, the inner wire travel ratio must remain perfectly accurate. If the inner travel is incorrect, the mower will not engage or disengage properly. This renders the machine unsafe to operate.
